Please visit Dr. Bear visits Doggo Doggosso to see finished artworks.
Abstraction comes from unrealistic colors, fracturing, and distortion. This tutorial is about fracturing.
Here is Dr. Bear. I start by minimizing the background, select color range.
After selecting the background color, I copy the background and use the bucket to make it black.
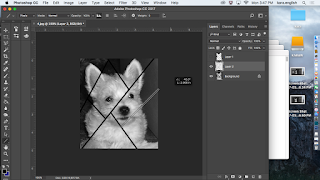
In a new layer I draw fracture lines.
I select the lines so I can cut them into my photo layer.
I have then gone to inverse in selection.
In edit on the background I choose copy.
Copy Special
I then cut the lines.
With my selection polygon lasso tool I select a selection, cut, then paste it on its own layer.
Second selection.
Etcetera until complete.
In each layer I go to Adjust color balance (remember, wild color Fauves) and make the first layer blue.
Second layer red.
Third layer etc.
In the background I change with adjust threshold.
After duplicating I make one Blue.
Here is my black only threshold background.
Now I am moving my layers around to fracture the photo.
Some of them need to change size- using the edit tool.
The yellow selection gets larger in edit.
More moving- note the double nose.
Some of the layers are then rotated.
I add the black lines back.
And the black background on the top layer.
Now I will add one or more different filters to each layer.
When It is more loud than I like, after editing I fade filter gallery in edit.
I can also adjust using equalize or many different adjustments.
When finished, I try different layer styles, blending options in each layer. Some I may duplicate.
Here I am adjusting by changing hue and saturation.
I also am adding an adjustment gradient.
Her I am changing the layer style of the black layer.
Here is a duplicate of all the layers with a new adjustment.
Right now I like what I see, so save it so I still can play with other changes.
More changes.
A second look.


