Artwork made from or with iPad Apps.
Tuesday, September 5, 2017
Making Art With iPad
Artwork made from or with iPad Apps.
Saturday, September 2, 2017
Using iPad Apps
1. Digital iPad Experiments- making printed papers from Apps
Rubric
Make at least three images for each element or principle of Design, Print to use with collage Label back with pencil which element or principle it best represents. Must be sprayed with Krylon Spray for collage material.Making Art with iPad Apps
I usually start with digital photographs of my own artwork before playing with Apps. I recommend this with you when possible.
After playing with an App I can do three things, print to use as is if good enough, print to use with collage, or save to continue to work in computer digital artwork.
* Line –
Possible iPad Apps Scribblify Lite, Tiltoria, Fluid, Tripout Etchings, Motion Paint, Deco Sketch Hypnoglyph Adobe Shape.Etchings
0
* Scribblify
* Deco Sketch
* Shape -
Possible iPad Apps Daily Monster, Collage Pro* Pattern -
Possible iPad Apps KaleidoPaint, I-Ornament* I-Ornament
* Form -
Possible iPad Apps Matter, Handy, Water Effect, Pottery, Fragment* Form
* Matter
* Fragment
* Space -
Possible iPad Apps Art Pose, Cube, Flow
* Texture -
Possible iPad Apps Glaze, Pixel-Twister, Tangled FX, Percolator, Pointalist
* Glaze
* Percolator
* Color - Possible iPad Apps Sketch Guru, Pixlromantic, Repix, Photo PS, Waterlogue, Popsi-Color
* Sketch Guru
* Pixlromantic
* Waterlogue
* Popsicolor
* Balance - Possible iPad Apps Photo Mirror
* Photomirror
* Rhythm - Possible iPad Apps Cool Camera, Splitpic, Lightly
* Salvadore Dali Camera
* Blogger
Monday, April 3, 2017
Using Photoshop 3/D to Draw an Animal Eye


Here is Vivid Light.

Here is the light in front of the sphere.

Go to layer an flatten your sphere when it looks correct. If it does not flatten with direct front light try again.

Here I duplicate the one sphere and free transform it to be just a little smaller and position it right above the first sphere.

To make it just a little wider I went to edit, puppet warp and placed two pins opposite of each other on the side and elongated the sphere slightly.

I want to color balance and changed the color of the second speaker to red and yellow all the way to make a brown ring.

I then used the shape tool to create a perfect circle shape holding the shift key
as I created the shape in the pixel mode so I would not need to rasterize the shape. I chose the color of dark brown.

With the shape selected, and using the gradient bucket with black and brown in my color swatches and the circular gradient mode in the top menu, I added a gradient to the shape on a new layer.

The eye is starting to look more real, but when I check an animals eye, the gradient will not look quite real.

To remove the line, I selected the shape. and under modify I chose expand.

I chose to expand by one pixel.

Under filter I chose Gaussian Blur.

I blurred a great amount, to look real, but it is still solid.

On the white background layer I change the channel and output to a darker color to show the dark layer on the outside of an dog's eye.


I duplicate the layer so I can add specks.

On the new layer and changed the opacity. I then change the mode from normal to dissolve to create the little specks seen in an eye.

One more time with the shape tool I create a small white circle shape. I duplicate the small white shape.


Then with the second white shape I edit transform it and change the opacity to be a little softer.

The eye is looking quite real here, but still has more highlights in the wolf photo.

Duplicating the highlight, I move it to the outer edge of the black outline.

I change the transparency of the highlight, and then notice that this should line up with the highlight. Then I edit transform and flip horizontal.

The Highlight is then in the correct place, I save it as a Photo shop document. Then I flatten the eye and save it as a large jpg. The eye is then ready for use in a front on dog drawing.

Wednesday, March 29, 2017
Create a Fractured Cubist Painting
Please visit Dr. Bear visits Doggo Doggosso to see finished artworks.
Abstraction comes from unrealistic colors, fracturing, and distortion. This tutorial is about fracturing.

Here is Dr. Bear. I start by minimizing the background, select color range.


In a new layer I draw fracture lines.

I select the lines so I can cut them into my photo layer.

I have then gone to inverse in selection.

In edit on the background I choose copy.

Copy Special

I then cut the lines.


Second selection.
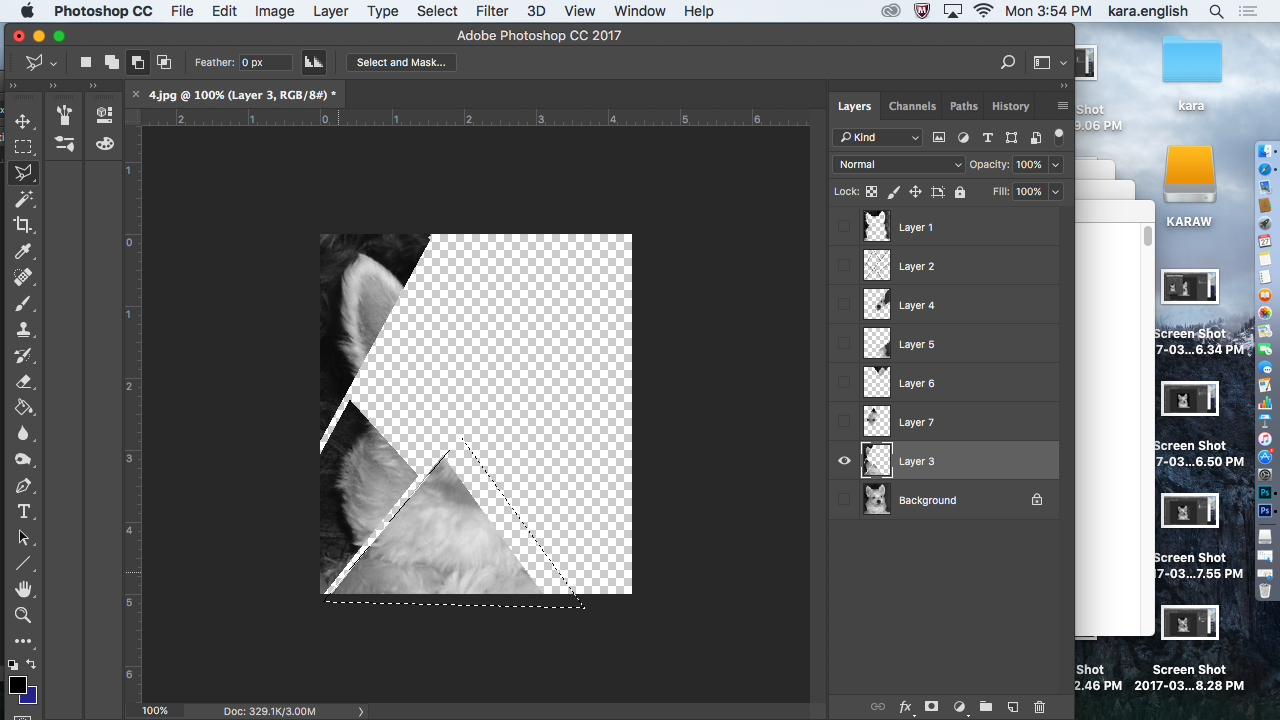
Etcetera until complete.

In each layer I go to Adjust color balance (remember, wild color Fauves) and make the first layer blue.

Second layer red.

Third layer etc.

In the background I change with adjust threshold.

After duplicating I make one Blue.

Here is my black only threshold background.

Now I am moving my layers around to fracture the photo.

Some of them need to change size- using the edit tool.
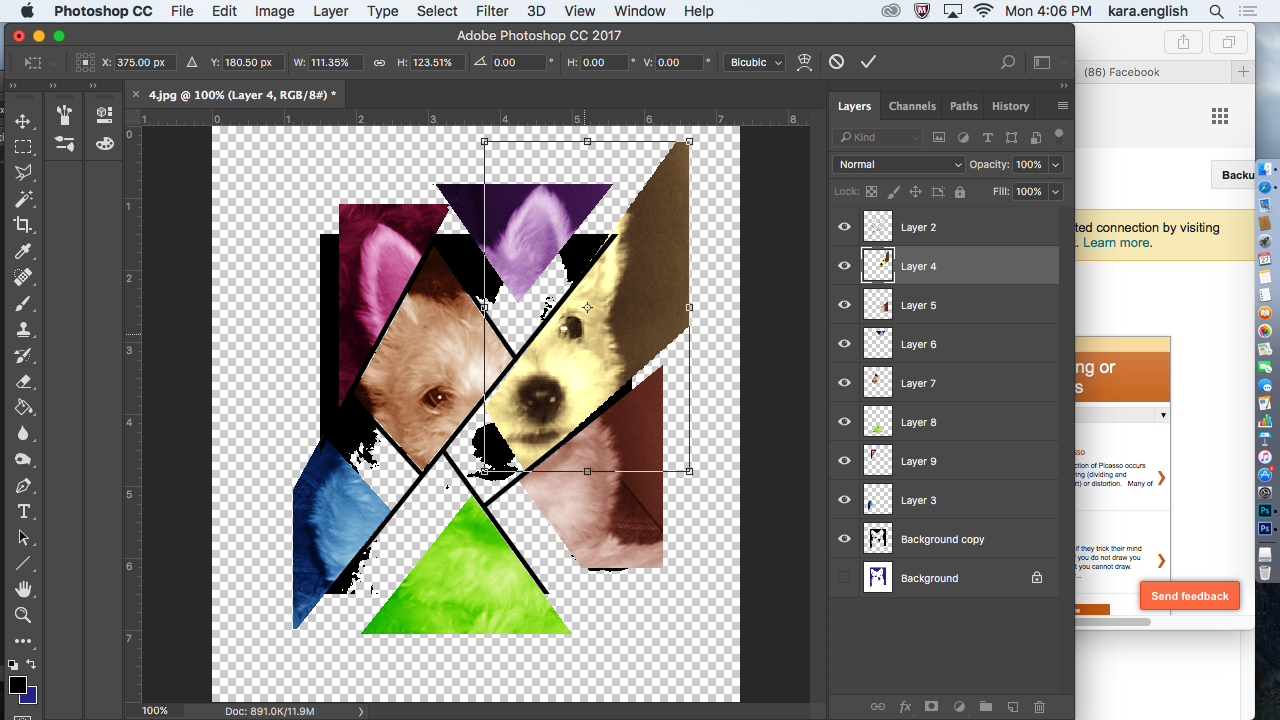
The yellow selection gets larger in edit.

More moving- note the double nose.

Some of the layers are then rotated.

I add the black lines back.

And the black background on the top layer.

Now I will add one or more different filters to each layer.

When It is more loud than I like, after editing I fade filter gallery in edit.

I can also adjust using equalize or many different adjustments.

When finished, I try different layer styles, blending options in each layer. Some I may duplicate.

Here I am adjusting by changing hue and saturation.

I also am adding an adjustment gradient.

Her I am changing the layer style of the black layer.

Here is a duplicate of all the layers with a new adjustment.

Right now I like what I see, so save it so I still can play with other changes.

More changes.

A second look.
Subscribe to:
Posts (Atom)